Showing posts with label Fermentation. Show all posts

Saturday, March 9, 2019

My Gaps Diet

GAPS Diet


Gut and Psychology Syndrome and Gut Physiology Syndrome.  

What exactly is GAPS?  GAPS is an eating protocol or an elimination diet. It was put together by Dr. Natasha Campbell-McBride  Most people don't realize it is two issues and type groups that have the same acronym. It is undertaken by those who come to a realization that they have severe gut issues and problems. Acid reflux, Diverticulosis,  IBS, Constipation, Frequent Diarrhea, Nausea, Frequent Tummy Aches, Upset Stomach, etc....... This would be the Physiology side of Gaps. The psychology side is neurological. ADD, ADHD, Autism, and many other psychological issues.


Gaps

People are willing to undertake this eating protocol to heal their gut. Science is proving more and more every day that the gut is in charge of so many things having to do with our day-to-day living. Our gut controls so many aspects of our body. Take the time to google the gut-brain connection and read some of the studies from the top hospitals in our nation. They all tie our gut, endocrine systems, and brain together in a dance that for most of us is way out of balance. This, in turn, has made all of us way out of balance.  We are taking antibiotics and other prescription drugs that treat symptoms but do not cure them. In many cases, a whole host of new problems arise from the medications that are meant to help.

This eating protocol is a drastic yet simplified way of eating through the elimination of Frankenstein foods, ( Processed Foods) and returning to simply eating whole foods. You also remove all grains, sugars, dairy, as well as the Frankenstein foods.  The focus revolves around something from our past that has been lost through reliance on prepackaged and store-bought foods. It isn't forever just until you heal. After one month,  I see a drastic difference, but I also still have a way to go. My gut is bad and I am too overweight. 

Broths

Ask anyone you know in their late forties and early fifties, if they remember their grandmothers and great grandmothers always having a pot of soup or stock on the stove. The resounding answer you may hear is that yes they always had soup going or were always cooking soup. Why is that? Everyone knows or has heard. Oh, feed them chicken soup. In the past Mothers and Grandmothers knew that soup and broth heal, yet society has moved away from and has disbelief that soup actually heals.  Old wives' tales meet science.

An old story talks of a woman who had two chickens. One seemed sick. Rather than put it down, she killed the healthy chicken and fed its broth to the sick chicken. Her family enjoyed the chicken soup as well. The sick chicken got well and later became a pot of chicken soup. She killed the one healthy chicken to heal the sick chicken and ensured her family ate two chickens.  


Water Kefir
The GAPS diet or protocol is meat stock, meat broth, and bone broths first, then the broths and stocks are made into nutrient-dense soups. Adding in naturally occurring probiotic foods in increasing amounts heals the gut wall and helps the gut strip itself and reform with new gut lining.
Fermented Vegetables
Kombucha

While making broths you will need to bring your constitution up as to what level of broth you can go. You can use basic bones and carcasses, or you can experiment and add more parts of the animal that will bring deeper healing. The bones and fat will suffice if that is all you can bring yourself to do. My daughter and I chose to experiment for the healing.

Eating whole animals has been removed from our mindset. I remember it began in my generation. When my sister was little I remember she wouldn't eat eggs when she found out they came from a chicken butt.

Eating these fats and proteins binds together separated gut lining most often referred to as leaky gut back together through a tightening and reformation of the gut wall and lining. It takes as little as a few days or as long as a few months. It simply depends on the severity of your gut health. The Gut is tied to both the psychological and physiological aspects of GAPS. Healing the gut starts to help or contribute to a lessening of symptoms of severity. 

My GAPS Journey


I think all of my children have gut health issues that tie into auto-immune disorders or constipation. Since discovering GAPS I have tried to encourage all five to consider GAPS.

About four years ago I was told I have a floating gall stone, and raging acid reflux. I didn't even know I have acid reflux. My doctor, as well as a technician who took my gut pictures, said mine was one of the worst they had ever seen. It is silent but could be deadly. Not being aware of acid reflux can silently erode your esophageal lining and at times lead to throat cancer. I was also told that I have fatty liver disease.

I took meds for a short time for the acid then quit as it made me have high blood pressure. The acid reflux I didn't know I had, I know I have now, since starting and stopping the medication. In one of my many internet searches, I finally found GAPS  

The author of the GAPS Diet, Dr. Natasha Campbell-McBride did a three-part series about her book. If you have any type of gut issues, then most likely your whole family does. This video series is well worth your time. Each part of the series is about thirty minutes.


Since starting GAPS in February 2019 my gut is soft and squishy not distended and hard. Inflammation in my whole body has gone down and I have lost thirteen pounds. I am still on the introduction phase of GAPS and I plan to stay on it as long as I can stand it. I'm not bothered eating soups. I make broths, and set aside the meat and then make soups. 

My daughter and I are both now on GAPS. She is a full-time teacher and very busy. She is also recovering from a nuclear die-off of her thyroid. When she researched what I was doing she asked to join me. Her immune system is severely compromised by her thyroid issues. Her doctors helped her make the decision to kill off her thyroid as her symptoms were becoming life-threatening. 

So, my week is made up of making broth and soups for us for the week. I started making broths with a full array of veggies for flavor but switched to just broth. I have since put back the veggies for flavor upon request by my daughter. Some soups are whole and some are pureed. The chicken carrot pureed is delicious.
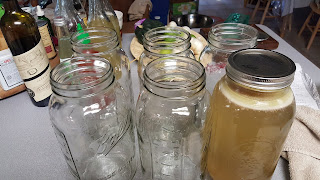
Next round I am trying tomato. This batch in the photo was broccoli and carrot pureed as well as chicken broth.

On the introductory protocol, you can have salt and pepper and just about any vegetable removing the most fibrous parts.  Any veg you find bothers you at first you can remove it before eating your soup or omit and reintroduce later. It can be in the soup for flavor and removed before consumption.  The only exception is no potatoes and parsnips. We are currently doing meat broth. We save the bones to reuse in the next batch once they are removed. All my meat broths are simmered no more than three to four hours. When the bones are cool I place in a ziplock freezer bag or vacuum seal, date, and then place in the freezer.  When I use them a second time, I add them with the fresh item, be it chicken, beef, or lamb and then discard them.  ( I have since stopped adding the bones to the next batch of broth and I am just saving them for future batches of bone broth at a later date in the protocol. )  
Freezing Bones

It took me a bit of research on how long you can freeze bones for batches of bone broth. It seems it doesn't matter how old they are as bone-broth cooks so long and with the vegetables for flavor as well apple cider vinegar they will make a broth and taste fine. The USDA Was My Source


I  found that after the first week my cravings were almost none. I have a few slip-ups, but I have gone black coffee no more milk or cream, and no sugars. I had previously switched to sweetleaf and rarely have sugar at all anymore. Previously I had also stopped first using artificial creamers and went back to half and half. In the last year, I had switched to full cream.  Now the only milk I have is yogurt.  We have even located raw milk and are making our own raw yogurt. When I don't have raw milk I just get the best low homogenized organic milk. I usually get Kalona Super Natural Organic Whole Milk. I also simplified the making of yogurt by buying an inexpensive machine that took all the ability to mess it up out. I also bought the extender accessory and extra jars as I always have more than seven jars when I make yogurt. 


I think the fats and oils in the broth stop the cravings. I know when I drink my broth I am usually satisfied, but you have to eat the soup four to six times a day to have proper nutrition. 

We try and use organic where ever possible. We found a store for local pasture-raised and healthy-fed lamb, chicken, beef, and goat. The store is a Halal meat market and doesn't claim to be organic. The animals are just raised on pasture, in a healthy manner and it is local. It is actually cheaper than the grocery store. The taste is by far so much better than what I am buying at our grocery stores. I know that the meat is better than the grocery because the animals are out on pasture. We can get almost all the bones and joints for the broths also. It is awesome to behold, they bring the carcass out and cut the bone type you request right off a hunk of the animal. Now that is FRESH!  

We are working our way up to trying goat. Neither of us has ever had it that we remember. Here are this week's broths and soups. I'll try and update weekly what soups I have concocted as I can get out of the kitchen!

22-quart roaster Beef Broth 


1 leg shank, 1 package of neck bones, 2 pounds stew meat, 1 half-gallon previous beef broth made with the same bones, but also 1 pack of beef hoofs


8 stalks of celery chopped small
2 medium to large onions chopped small
1 leek well washed brown bits removed. Include all green stalk that is healthy for flavor
6 whole organic carrots unpeeled. peeled if unable to find organic. Leave them whole. 
4 or 5 cloves of garlic if desired. I leave out as I find the broth gets a weird flavor. I add garlic at the time I make the soup.  
2 organic chickens, or other meats and bones.

Bring roaster to a boil,  turn down to simmer  Salt and pepper to taste when the chicken, beef, lamb, or pork has begun to release into the water and it is cooked enough to be safe for tasting.  Simmer for two and a half to three hours. Just until the meat wants to fall off the bone or fall apart. If you miss well fish it all out. No big deal just more work. Remove carrots if they are cooked and you can serve them with another meal. Or eat when you want to go for carbs or sugar. Continue to simmer roaster until the meat cools and you can pull it from the bone. Set all meat aside and put back in all bones, gristle, guts, gook, and fat. Add back all water and oil that ran off the meat while cooling. Simmer one more hour. 

At this time I usually put the broth in half-gallon jars and quart mason jars. 


When cool I refrigerate.  I already had some half-gallon mason jars. Most often they are all full but I was able to combine things or put in smaller mason jars and cull out seven jars. My daughter purchased two packs of six jars. This past week I bought another six-pack of half-gallon jars. I can make three types of soups that last us both all week and then broth to drink throughout the day.  My pans are large soup pans and I can usually get us each two gallons of soup and a bit from each pan. 

Repeat with beef bones and lamb bones. Not really any variation on the broths when I make them. They are the same ingredients in the same quantities,  just different bones. 

Because I make three soups at one time I chop and sautee my onions, celery, and leeks in one pan and split between the three pans. I sautee them first because I think the richness adds to the overall flavor of the soup. 


Chicken Broth

Made with 2 whole organic chickens and 5 chicken feet
(this batch was the first time I used chicken feet and I used too many.)

Chicken soup (Peas and carrots)


In a large soup pan, add broth into the pan until half full.  Sautee a large onion chopped, 1-2 leeks rinsed well with brown removed or cutaway. Use all the leek including the green and chop finely,  8 stalks of celery chopped. Add to broth.  till tender and add to broth. 
Add
1 large bag of peas
8-10 carrots chopped
1 half-cup sauteed mushrooms
salt and pepper taste
add broth until the pan is just full enough to simmer without boiling over. 
Simmer until all ingredients are done. Cool and bottle up into the fridge. 

Chicken soup ( yellow squash, carrot, and Brussel sprouts)


In a large soup pan, add broth into the pan until half full.  Sautee a large onion chopped, 1-2 leeks rinsed well with brown removed or cutaway. Use all the leek including the green and chop finely,  8 stalks of celery chopped. Add to broth.  till tender and add to broth.
1-2 cups chicken cooked in broth
3-5 fresh yellow squash chopped or 1 bag frozen
2 bags frozen Brussel sprouts braised and browned
4-6 chopped carrots
1 half-cup sauteed mushrooms
1 cup chopped red, yellow,  orange, and green bell pepper
salt and pepper to taste
simmer soup until cooked. Cool and bottle up put in the refrigerator 

Beef Soup ( Turnip, Kale, Napa Cabbage, and Carrot)


In a large soup pan, add broth into the pan until half full.  Sautee a large onion chopped, 1-2 leeks rinsed well with brown removed or cutaway. Use all the leek including the green and chop finely,  8 stalks of celery chopped. Add to broth.  till tender and add to broth.

8 turnips chopped 
1 napa cabbage
10 carrots
1 half-cup sauteed mushrooms
2 bunches Kale
all the beef removed from making the broth
salt and pepper to taste. 

simmer until well cooked and then cool and bottle up for the refrigerator.

Until the next soup!!


Thursday, October 4, 2018

Second Fermentation of Kombucha Part Three


We started off making our own scoby, then we progressed to making our own batch of kombucha. We find ourselves at the glorious part of flavoring the finished kombucha and letting it ferment for a second time and get even fizzier. 


Our favorite seems to be Pineapple. I prefer fresh or frozen pineapple chunks, but canned is also good in a pinch.  First things first you need to find some good glass bottles. I use several different types. 

The first type I use is glass bottles that are squared. They are called French Glass squared, but they don't seal well or tight enough for kombucha. They are pretty but don't get the seal as tight. The second type I like is swing top fermentation bottles. Originally I got my bottles one at a time at Sprouts. I bought a bottle of French sparkling lemonade in a swing top bottle for 1.99. Recently they raised the price to 2.99 per bottle. It is actually cheaper to buy a case now on amazon prime.
My favorite bottle at this point and time is
 This is a 6 pack case bottles of Kevita Probiotic Coconut Kiefer that I bought at Costco for 11.99 per case.  I bought it specifically for the bottles. I figured the cost and it was as good or better deal for the bottles as buying bottles. Plus I knew it would create a good tight seal. So I bought them, drank them, and cleaned the bottles for future kombucha 2nd ferments. The jars seal tightly and create a wonderful fizz. I like these kevita bottles the best and the swing top bottles the second best. As you can see from my image it is fizzing over, and that was just twenty-four hours. They are also way easier to clean with a bottle brush than any of the other bottles. 

2nd Fermenting

The first thing to do is to make sure all your bottles are clean. Gather all your funnels and scoops and measuring cups as well as your completed kombucha. Clean any bottles that aren't completely clean. There is never a time that I don't find one or two bottles I thought were clean that could be cleaner. Find a GLASS jar to store your scoby in if you are not making another batch of kombucha right away. Typically I will start another batch and then do the second ferment. Make some Fresh sweet tea, set aside to cool. Place your scoby in the tea with a cup or two of starter liquid.

Prepare your fruit
Place fresh or frozen fruit in a glass jar. You can also use fruit juices. I would use organic juices, but that again is my preference. The second ferment process will eat most of the sugar present in juice and fruit. The brewing process has eaten most of the sugar present. Adding fruit gives it a 2nd sugar to eat and as it has already fermented, it will gobble the new sugar up and that is the added carbonation. When you add the brewed kombucha to the fruit it's going to start eating it right away. I put about an inch of fruit or juice in each bottle. 
Fill the jar to top with the finished kombucha. Screw the lid down tightly. After placing the lid on tightly rinse the outside of jars and place on a kitchen towel to ferment for a few days until fruit sugars have been eaten and it is at the optimal taste profile for you. The longer you leave it the less sweet it will be. Do not leave longer than 2 to 3 days max or you will have an explosion in your kitchen.
I burp my bottles at least once a day to stop mild eruptions in my kitchen. When it is ready, I get a big bowl in a clean sink and  I strain all the fruit out and combine all same flavors of the 2nd fermented kombucha into one bowl. I then refill the bottles before placing in the refrigerator. I do this each time with each different flavor. I always set even my unflavored kombucha aside along with the fruit flavored in tight bottles. The unflavored will also get fizzier.


They will last several months and begin to get more tart and fizzy at a slower pace in the refrigerator. At this time my favorite flavor is pineapple and honey lemon and lemon ginger. Play with the flavors and find the ones you like the best. Search for recipes on the internet. Your taste is going to determine your favorite flavors. It is very easy to play around until you find that flavor. 
Happy happy Booch Babes!!!!!

Sunday, August 19, 2018

Kombucha: How To Make

Kombucha

How To Start Making Your Own Kombucha

Part Two Of Three


Three Gallon Jar

What Is Kombucha?

So now that you have spent the last three to four weeks making your Kombucha Scoby, Find my first article here.  Making Your Own Kombucha Scoby Perhaps you purchased a scoby, or got one from a friend. Whatever way that you obtained your scoby, you now have all you need to make your own kombucha.
 

 What exactly is kombucha? It is a very ancient drink, that goes by many names worldwide. The Chinese, who are said to be the inventors, call it the Tea Of Immortality. An interesting article I found when I first started researching kombucha before I started making it my self,  tells the story of kombucha in the 1800s by an Australian writer.  It is known in Australia as the China Story. The Tea Of Immortality  


Weston A Price Foundation is an organization that was founded by Weston A Price.  Weston A. Price was a dentist. He traveled the world in search of scientific data on nutrition and diet and the decay and deformity of teeth based on diet. He found in undisturbed and indigenous peoples that generations of eating whole nutrient dense foods allowed for optimal health. This didn't mean third world countries. It was also first world nations of ethnic communities following ethnic rich diets. His foundation is dedicated to the continuation of the truth in the diet. Here is an article from that website about kombucha. Kvass And Kombucha, Gifts From Russia.


Scientific Data

So as always, when I want information,  I go out and look what is out there. The first thing that amazed me on articles on Making Kombucha, or is Kombucha Safe, that there is a glorious regurgitation of each others information. The general articles are mostly giving you their opinion based on other articles out there. I have gone out of my way not to do this and to push you to do your own research.

 I have learned over time that one article is not enough. I read 100s of articles on any subject I am studying. I actually have found a pretty good scientific article on kombucha. Actual studies over a span of years. It begins with what is kombucha, and later in the article actual studies. You can find it here. Wiley Online Library The second set of articles I found was a medical conference. In the sidebar of the website are tons of gastrointestinal subjects covered at the conference. I started reading them based on a search on kombucha and gut health. Reading articles from the leading doctors and researchers of the gastrointestinal system seems like heavy reading, but if you have gut problems and issues it is more than worth your time and effort to educate yourself on options that are nonprescription.
 Journal of Gastrointestinal & Digestive System  When you make the decision to make kombucha, base your decision on sound research you have done your self. Don't stop looking for or reading articles till you feel you have learned as much as you can about kombucha.

Health Benefits

There are frankly some crazy articles out there on the health claims of kombucha. I stuck to the facts when I was researching. Fact: kombucha will help with gut health. Kombucha is jam-packed with probiotics. Good, healthy, natural probiotics. Gut health in our society is bad. More and More research is pointing to the gut as the clear controller of our bodies, our endocrine systems, as well as autoimmune inconsistencies. Recently they have found that the gut controls serotonin in the brain.  There are too many articles to link. Do a google search for the gut and brain connection and you will find articles from the leading research hospitals in the world. Harvard, John's Hopkins among a few. Seriously your stomach tells your brain what to do? A sick gut is a precursor to many health issues suffered by just about everyone we know, if not ourselves. A good set of articles I found, were on our ancestral microbes and gut flora.

 Gut Microbes May Reduce Heart Disease Risk.......

Scientists Call for a Noah's Ark Of Human Microbes

Vitamin D Deficiencies 

Recently I have been following research on vitamin D, gut health, and insomnia. One night when I couldn't sleep......... I found a video on your tube about Vitamin D, Gut health, and sleep. Perhaps I am weird, but I found it fascinating. But I have gut issues and insomnia. Much of what this doctor says has to do with probiotics and of course the gut. I also felt I had been struck by a Mandela effect or something when most everyone I knew was coming up extremely low in vitamin D around the same time. 


 So many things are pointing to the gut that it is mind-blowing. Hippocrates lived over 2000 years ago, and even back then he said two things that resonate today.  Two loosely quoted statements most of us are aware of are: all disease begins in the gut, and let your food be your medicine and your medicine be your food.   So what does all this have to do with Kombucha? Probiotics  Which Kombucha is full of naturally through the process of fermentation.  

Probiotics For The Win

Kombucha has many probiotic strains in it, as well as the B vitamin profiles. The longer your kombucha goes, the larger the chance you have of more probiotic strains appearing in your kombucha.
In an article on the Cultures For Health website, they talk about different strains of probiotics in kombucha. They do sell kombucha making supplies,  but if you were going to go that route I think a better website would be, Cultured Food Life  This companies products are always going to be fresh and never dehydrated. They are shipped live in airtight packaging and only sent once a week for optimum freshness and viability.  If I was purchasing that would be the route I would go. When I start to make Kefir, this is where I will go to get my grains.  It again goes back to do your reading, your research. Fact check and then fact check again.

here is the link to the article where this information is quoted from.        Cultures For Health

Probiotics: Bacteria & Yeast
QUOTE
The specific bacteria and yeast strains in the kombucha are what make it act the way it does, and what produce the fizz and flavor of kombucha. Not all kombucha cultures will contain the exact same strains, but these are some that have been recorded in studies:
Acetobacter [2] is an aerobic (requiring oxygen) bacteria strain that produces acetic acid and gluconic acid. It is always found in kombucha. Acetobacter strains also build the scoby mushroom. Acetobacter xylinoides and acetobacter ketogenum are two strains that you might find in kombucha.
Saccharomyces [2] includes a number of yeast strains that produce alcohol and are the most common types of yeast found in kombucha. They can be aerobic or anaerobic (requires an oxygen-free environment). They include Saccharomycodes ludwigii, Saccharomycodes apiculatus, Schizosaccharomyces pombe, Zygosaccharomyes, and Saccharomyces cerevisiae.
Brettanomyces [2] is another type of yeast strain, either aerobic or anaerobic, that are commonly found in kombucha and produce alcohol or acetic acid.
Lactobacillus [2]: A type of aerobic bacteria that is sometimes, but not always, found in kombucha. It produces lactic acid and slime.
Pediococcus [2]: These anaerobic bacteria produce lactic acid and slime. They are sometimes, but not always, found in kombucha.
Gluconacetobacter kombuchae [2] is an anaerobic bacteria that is unique to kombucha. It feeds on nitrogen that is found in tea and produces acetic acid and gluconic acid, as well as building the scoby.
Zygosaccharomyces kombuchaensis [3] is a yeast strain that is unique to kombucha. It produces alcohol and carbonation as well as contributing to the mushroom body. END QUOTE

You can do single batch brews of kombucha, or you can set yourself up with a process they call continuous brew.  My thought is, gaining probiotics naturally through a natural product that I control is way better than taking a pill from a bottle. If I am already taking probiotics,  and I know they help why not take control of where my probiotics are coming from. More and more doctors, mine included are telling their patients to take probiotics. They encourage you to take the best brands out there. At least mine does. So a probiotic that I make, and control, is the way I want to go. These are all facts. 

I began my search as I have a sluggish liver and gallbladder. I do not want to have my gallbladder removed so I set off on a search for ways to help and or heal my gastrointestinal issues, What I came up with over and over again was fermented foods. I found much on how kombucha can heal and detox the liver and gallbladder. This had my interest, so I kept reading. Of all the fermented foods kombucha seems the easiest for me to keep up with and also get my husband to take seriously. 

Since starting to drink kombucha, we both notice a difference with our reflux and way fewer issues of constipation. I decided to make kombucha myself because of the inflated cost to buy it. So began my journey to making my own! My advice to you is read, read, and read more articles. You also will begin to see a correlation between repeated and regurgitated info. but if you keep digging the truth of the health benefits will begin to present itself. I have made sure I have not called out a bunch of crazy claims. Just because someone has said it or wrote it down, doesn't make it so. I in no way want to be lumped in with all the others who are regurgitating other articles.  I have tried to point you toward some truth in writing, and encourage you to do more research. Something made you start looking at Kombucha. Keep looking!!!

Making Kombucha


Gather your ingredients and tools.

Never brew, or store your kombucha in anything but glass containers or bottles. When you get your scoby, place it in a glass jar with its liquid. Place out of direct sunlight on the counter until you are ready to make your kombucha.  When your kombucha is finished, store it only in glass jars. If you must break your brewing cycle, store your scoby in a glass jar with a good amount of fresh tea and starter. Place a paper towel or kitchen towel with a rubber band and set in a place out of sunlight. Periodically dump off a bit and add a room temperature cup very sweet tea to feed your scoby. When you are ready to brew kombucha again make a throwaway batch just to wake up your scoby. Unless you fed your scoby periodically your scoby is going to be hungry. Making a throwaway batch is not necessary, but I find the second batch to taste better after you restart brewing after a pause.

Never store your scoby in the refrigerator. There are articles, blogs, and videos that advise you to do this when not brewing kombucha. Over time, it will weaken if not kill your scoby. Store it on the counter, out of the way,  out of sunlight. Here is what you will need to make kombucha:

  • One to two cups starter liquid. [previously brewed kombucha, or liquid that came with your scoby]
  • A healthy scoby
  • Six organic black tea bags or 6 tablespoons of loose leaf tea. For your first batch of kombucha using all black tea. In later batches, you can use green and black. Always make sure black is in the highest ratio.  Both green and black tea make first different taste profiles, but also nutrient profiles.  Later you can take a baby scoby and begin to do green tea if you prefer. The main thing is letting your new scoby get strong with your home, water, tea, and sugar environments. 
  • I had so many questions and unknowns, that I found a video that recommended a book all about kombucha. I do not regret buying it. The book will teach you different flavor profiles, different teas, and also general knowledge. There are tons of photos that show you how your kombucha should and could look during and after the brewing process. The Big Book Of Kombucha

  • One cup of organic sugar. [I recommend both organic tea and sugar. It is not required, but I think it makes for a better-tasting kombucha.]
  • One gallon jar.
  • One rubber band.
  • One paper towel or clean kitchen towel.
  • One gallon of filtered water. Remove one to two cups of water. This is so you can add your starter tea at the end of making your kombucha. [In your very first batch and in all your batches if you prefer, add two cups. The two cups add an assurance that your PH will be low enough for safety. Also depending on your eventual taste profile preference, your kombucha may brew a bit faster. ] If you only have one cup of starter, that is fine. You can always buy a bottle of plain kombucha with raw cultures and add another cup of that. 1 cup is enough only do this if you feel better doing it. 
  • PH levels, if you are really worried about your kombucha being safe, you can always buy PH strips and test your kombucha after adding one cup of starter to make sure the PH is low enough. If it is not the correct color you can always add the cup of raw strain kombucha from the store. Once you have established your own kombucha you could add 2 cups from your own. Never add white or apple cider vinegar as some websites might advise. They are different things and it will compromise your scoby health and future brews. 
  • Here is a link for test strips on Amazon. PH Test Strips
  • This year for Mother's Day We bought Mom a kombucha kit. It has the one-gallon jar, scoby, starter tea, test strips, and everything else you would need to get started.  Here is the one we bought.  Kombucha Brewing Kit


Making The Tea.

Take half of your filtered water and bring it to a boil. Remove from heat.  Then add your tea and sugar to the water. Stir well so that all the sugar is dissolved. Brew this 20 minutes. Then strain the tea or remove the tea bags. I love this strainer. I usually do 3 gallons at a time or use my 3-gallon jar. 


As I am brewing a tea concentrate this strainer allows me to strain a larger amount of tea than a regular tea filter. I make larger amounts of kombucha because so many are drinking it in my home. Most of the time I put the tea in the strainer and place it in with the hot water. I use it like in the photo if I got lazy and just put the tea directly in the water. 


 Pour the remaining water and the brewed tea into the one-gallon jar. This will cool the brewed tea down closer to room temperature. Allow the tea to sit until you know it to be room temperature, or use a food thermometer to test the temperature mid 70 degrees to 80 degrees is perfect. Any more than 80 degrees and let it cool some more. I actually love these temperature strips for the outside of my booch brew jars. I strongly recommend the ten pack as over time you have more and more jars rotating into your kombucha making.  10 Piece temperature strip pack


Once the tea is cooled to the optimal temperature so as not to kill your scoby, add your starter tea and your scoby. Place your paper towel or kitchen towel on the top of the jar and place the rubber band to secure. Place the kombucha out of the way in an area out of direct sunlight. It does not need to be in a dark corner. It does need to be in an area that the temperature will stay between 70-80 degrees. 69 is ok but lower than that and there is a potential for mold to grow. Rare, but it can happen. 

Let The waiting Begin!

Now all you do is wait five to ten days until the flavor is what you like. Don't fuss and worry and poke at it.  Just wait for it buttercup! Try and leave your kombucha undisturbed for around five days. Then begin tasting it for the flavor profile that you like.  I prefer mine at around five to seven days. The easiest way to taste without disturbing the scoby growth is to stick a straw in, put your finger over the end and draw out a taste. I like my kombucha to still retain some of the tea flavors. Now that your kombucha is to the flavor you like, you can bottle it up somehow or start the second ferment process. I drink both plain kombucha and flavored second ferment kombucha. Part three I will show the second ferment.  Remember to make and store all your kombucha only in glass jars. Wood, plastic, or ceramic could leach into the kombucha causing harm to you.
  Always, always. always use glass to make and store your kombucha


Sunday, April 29, 2018

Making A Sourdough Starter

MAKING A SOURDOUGH STARTER


The desire to bake bread

If you love bread and have wandered into the ways of breadmaking eventually you may want to try making sourdough bread. One needs a starter to use in the bread. The starter is used in place of yeast to make the bread rise and has a sour taste.  You can get a starter in multiple places.  You can start your own, or you may know a friend or family member who has one in their refrigerator and would give you a dollop or two to feed and make your own sourdough mix. You can order a starter from multiple places online, I have always wanted to get one from King Arthur Flour as they say their starter is over 100 years old.  King Arthur Soughdough Starter    

What Is Sourdough? 

It is a moist, and fermented starter you store until you use and it is also your baked goods. From your bread, rolls, cornbread, pizza, pretzels, to pancakes, waffles, and biscuits. You use the starter rather than yeast to make and bake. According  to the Merriam-Webster Dictionary,

sourdough
noun sour·dough \ ˈsau̇(-ə) r-ˌdō, sense 1 is also -ˈdō \

Definition of sourdough
: a leaven consisting of dough in which fermentation is active
: a type of dough that is allowed to ferment before it is baked and that has a slightly sour taste

There is no wrong way to make sourdough. The type and amount of flour to the consistency of the starter based on the liquid to dry ratio is all a personal choice. Eventually, when I can find GMO free Cornmeal, I think I will make a cornmeal sourdough starter. The type of liquid can and will vary based on the recipes and guideline you look up on how to make a starter. I have seen milk, whey, to pineapple juice added to the starter liquid. An interesting video I watched in my search is of an old family recipe from a youtube channel called: Food Farmer Earth. Their highlighted family recipe uses milk as the liquid. I might consider making a milk-based sourdough starter also, but I would want to use raw milk. 


You are surrounded by bacteria!


No matter where you are or where you live there are friendly bacteria surrounding you in and around your home. Wild yeast floating in your home and on the flour type you choose to use will combine and begin the fermentation process. The final result will be a sourdough starter that you store on your counter if you bake bread often or one you store in your refrigerator and feed weekly until you need it again. The cool environment slows down fermentation but does not stop it. I have heard tell of folks who forget to feed it and recover it back out on the counter adding in flour and water.  It is as simple as setting it out to come to room temperature. 

I made many attempts at making my own starter before I was finally successful. It wasn't because it was hard, but that I forgot I was making it and would forget to feed it. It would get pushed back on the counter and would dry out. One day I just had all the magic work, science and my memory and now I have a happy starter I use.

How do bacteria make bread?


Wild yeast is the bacteria that is all around us in our environment. it comes out to play in all countertop fermentations. Whether it is sauerkraut or sourdough wild yeast enter the mix and begin fermentation. In all fermentation Lactobacillus that is also in the air meet up with the wild yeasts and combine with the flour-water mixture and begin to eat the simple sugars that exist in flour. Over time the yeast feeding on the sugars creates the carbon dioxide bubbles that we begin to see. The sour taste is the regular feeding we give the yeasts and  Lactobacillus as they create the carbon dioxide. Upon combining a portion of this bubbling mixture to your bread recipe you don't need yeast as you have captured the wild yeast from your home and put it to work. Once the loaf of bread rises, the yeast begins to die, but the carbon dioxide is still trapped and your bread has formed. Bake and eat!!!

Making Your Own Starter 

When I finally made mine I opted for simple   1 Cup dry to a half a cup liquid.  

I used 1/2 cup organic white flour and 1/2 cup organic whole wheat flour. You don't have to use organic, nor both white and wheat you can use 1 cup of either. I chose the 1/2 cup each.


Flour and Water


Mix them well.


Then cover.


I used a 7-day method. 3 days at 24-hour fermentation, and 4 at 12-hour fermentation. For the first 3 days. Every 24 hours discard half the mixture. add back 1 cup flour and a half cup water. One day I might add white flour and the next whole wheat.


Mix well again.


After the first couple of days, you begin to see bubbles.


For the next 4 days discard half and add back 1 cup flour to 1/2 cup water every 12 hours. It is at this time you can start to use the discard and make biscuits or pancakes. Experiment with recipes you find online till you find one that will become your favorite. I am a firm believer in trial and error until you find something that works and tastes great.

Now that your starter is finished store in the refrigerator.


When you want to make something,  take out the amount that your recipe needs and add back 1 cup dry to half cup liquid. Thus, keeping it fed.  If you aren't using it regularly don't forget to weekly discard some or half and add back the 1 cup dry to 1/2 cup liquid ratios. I choose to keep mine at a high level in case I bake multiple loaves of bread. No way is the right way. Through time, study and finding what works for you, you will have a sourdough starter for the rest of your life. You could become the friend or family member giving out lovely dollops of sour joy! 


Persian tile ideas

These are the final colors I chose for my Persian tiles afghan by Janie Crow. I decided to not design a square but instead bought her patter...